
Why shouldn't accounts be created manually?
Humans are inconsistent, forgetful creatures. Ask us to do the same thing two or three times and chances are we'll do it two or three different ways. Manually clicking through a UI to create accounts leaves room for error, takes time, and ultimately costs money, particularly if the job is outsourced. Greater consistency, efficiency, and savings is an easy sell.
In this article, we'll build a system that creates accounts in two clicks.
Creating Entra ID accounts programmatically
There's two scripts we need, one to generate an initial password, and another to create the account in Entra ID.
Why do we need a script to create a password? Strictly speaking we don't; we could just define a few ranges like A-Z, a-z, 0-9 and select from them at random out to n length. However, that leaves us with the issue of homoglyphs. Is that an I or an l? We can sovle this with the EFF's short wordlist. It contains ~1300 words, selected to provide a balance of memorability and security when four of them are chosen and combined into a passphrase. The EFF envisions physical dice being rolled to select the numbers, obviously, we'll generate pseudo-random numbers with Powershell instead.
See New-Passphrase.ps1 on Github. To use it, be sure to include the short wordlist in the same directory as the script.
Ok, now we can create the actual account. I use a wrapper script around New-MgUser for this, which lets us define required and optional attributes and set a password more easily. See New-EntraIDUser.ps1. If you have multiple offices/locations, edit and uncomment the if statement beginning on line 54 to specify a location on the command line and have the street address attributes filled in automatically. Duplicate the entire block for each location.
You could just use these two scripts to create accounts and it'd certainly be faster than clicking through a UI. However, we want to create accounts in two clicks, right?
Creating an API
To reach our goal, we need an API endpoint that accepts POST requests with a JSON payload. Azure Functions provides a quick way to do this.
You'll need to install the Azure CLI before continuing.
Check out the AzFunction-New-EntraIDUser repo and open a Powershell terminal in the root directory of the project. Run "az login" to authenticate to Azure, then run the below commands. Replace "resource_group_name" with a real value. When prompted for a value for "appName," enter something like "NewUser."
az login
az group create --name resource_group_name --location westus2
az deployment group create --resource-group resource_group_name --template-file .\bicep\main.bicep
This will create a resource group and then create the function and supporting services within it. Next, we need to deploy the code. Again, replace "resource_group_name" and "name_of_function_app" with your actual values.
Before uploading the code to Azure, you need to put your domain name in the New-EntraIDUser.ps1 script located in the HttpTrigger1\scripts folder. The $emailDomain variable is on line 36.
Compress-Archive -Path .\requirements.psd1, .\profile.ps1, .\host.json, .\HttpTrigger1\ -DestinationPath .\project.zip
az functionapp deployment source config-zip -g resource_group_name -n name_of_function_app --src project.zip
Great, our code is uploaded and we can trigger it via POST. Now we need to assign the app's managed identity the "Users.ReadWrite.All" permission within MS Graph.
We need some Powershell modules for this:
Install-Module @("Az.Accounts", "Az.Resources") -Scope CurrentUser
Get the Managed Identity's ID:
az webapp identity show --name name_of_function_app --resource-group resource_group_name
Copy the value for "principalId" and paste it into the $managedIdentitySPN variable below, then copy & pate the entire code block into the terminal and execute it.
Connect-AzAccount
$managedIdentitySPN = ''
$msGraphPermissions = 'User.ReadWrite.All'

$msGraphAppId = '00000003-0000-0000-c000-000000000000'
$msGraphSPN = Get-AzADServicePrincipal -Filter "appId eq '$msGraphAppId'"
$appRoles = $msGraphSPN.AppRole | Where-Object {$_.Value -in $msGraphPermissions -and $_.AllowedMemberType -contains 'Application'}
$appRoles | % { New-AzADServicePrincipalAppRoleAssignment -ServicePrincipalId $managedIdentitySPN -ResourceId $msGraphSPN.Id -AppRoleId $_.Id }
I've had to wait 50 minutes for this to take effect before, so some patience is required here.
Using the API
Before we can use the API, we need to know the URL. To do that, we need to fetch the function key that needs to be included in the request in order for the function to execute. We also need to know the hostname.
To find the key:
az functionapp keys list --name name_of_function_app --resource-group resource_group_name
To find the hostname:
az functionapp config hostname list --webapp-name name_of_function_app --resource-group resource_group_name
Now you can build the URL from these two components. It should look like this: https://hostname/api/HttpTrigger1?code=function_key
Test it out by sending a POST request with a JSON payload the firstName and lastName attributes. Don't forget to change "hostname" and "function_key" in the code block below:
curl -X POST https://hostname/api/HttpTrigger1?code=function_key \
-H "Content-Type: application/json" \
-d '{
  "firstName": "Test",
  "lastName": "User"
}'
You should receive a 201 Created response and a JSON payload with the username & password of the account.
Collecting new employee details
Alright, so now what? This isn't doing us much good without a way to gather attributes and pass them to the API. Let's build a form to gather the data.
Note: You could also use a webhook from an HRIS to trigger the function and automate this too step. However, I want this series to be broadly applicable, so i'll demonstrate gathering the details manually.
Go to forms.office.com and create a new form with these fields:
- First Name
- Last Name
- Title
- Department
- Location
- Manager
- Start Date
Now set First Name, Last Name, and Manager as type "Text" and mark them as required. Set Location as type "Option" and add in your locations. This could be the city an office is in, the name of a building or facility, et cetera. Lastly, set Start Date as type "Date" and mark it required as well.
First & Last are required in order to create an account, however Manager and Start Date aren't technically necessary. They're just for IT's benefit.
Call the API via Power Automate
Go to make.powerautomate.com and create an "Automated cloud flow."
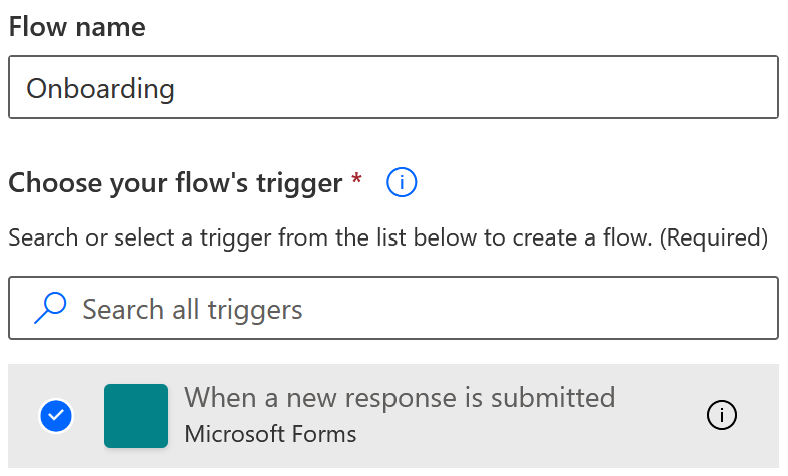
Enter a name and choose the trigger "When a new response in submitted" from MS Forms as the trigger.
Now add the action "Start and wait for an approval."
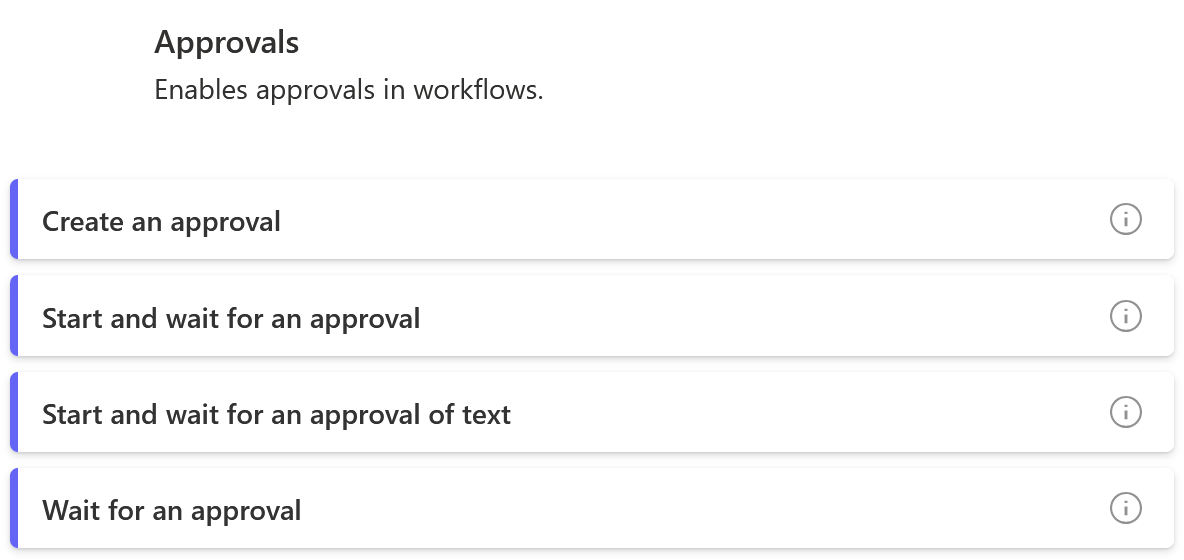
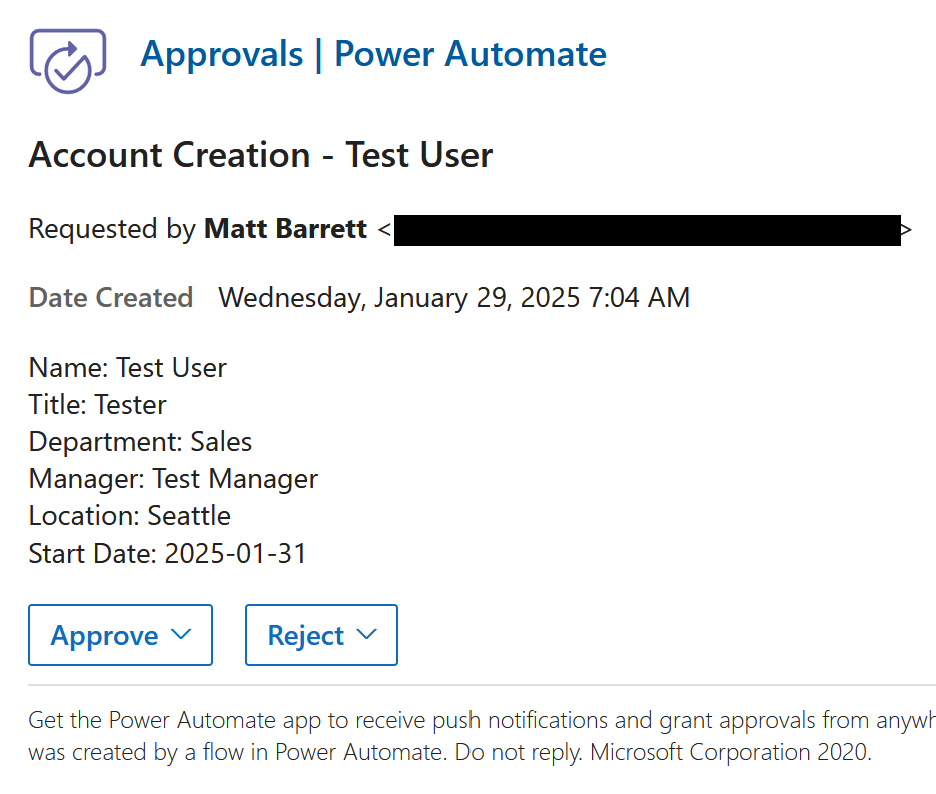
Select "Approve/Reject - First to respond" for the approval type, then give it a title and select your approvers. List out the new hire's attributes like name, title, start date, location, etc. in the details field.
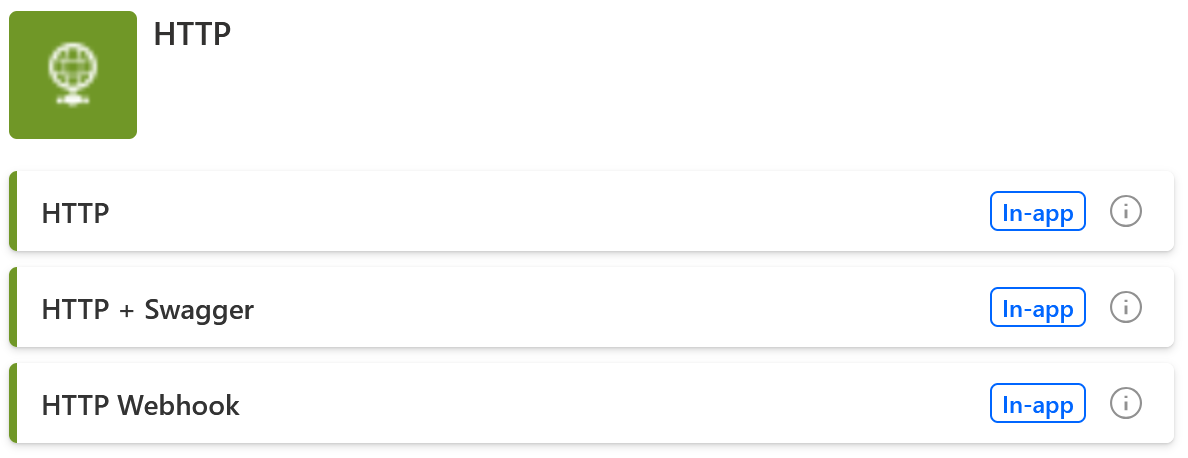
Next, add an HTTP action.
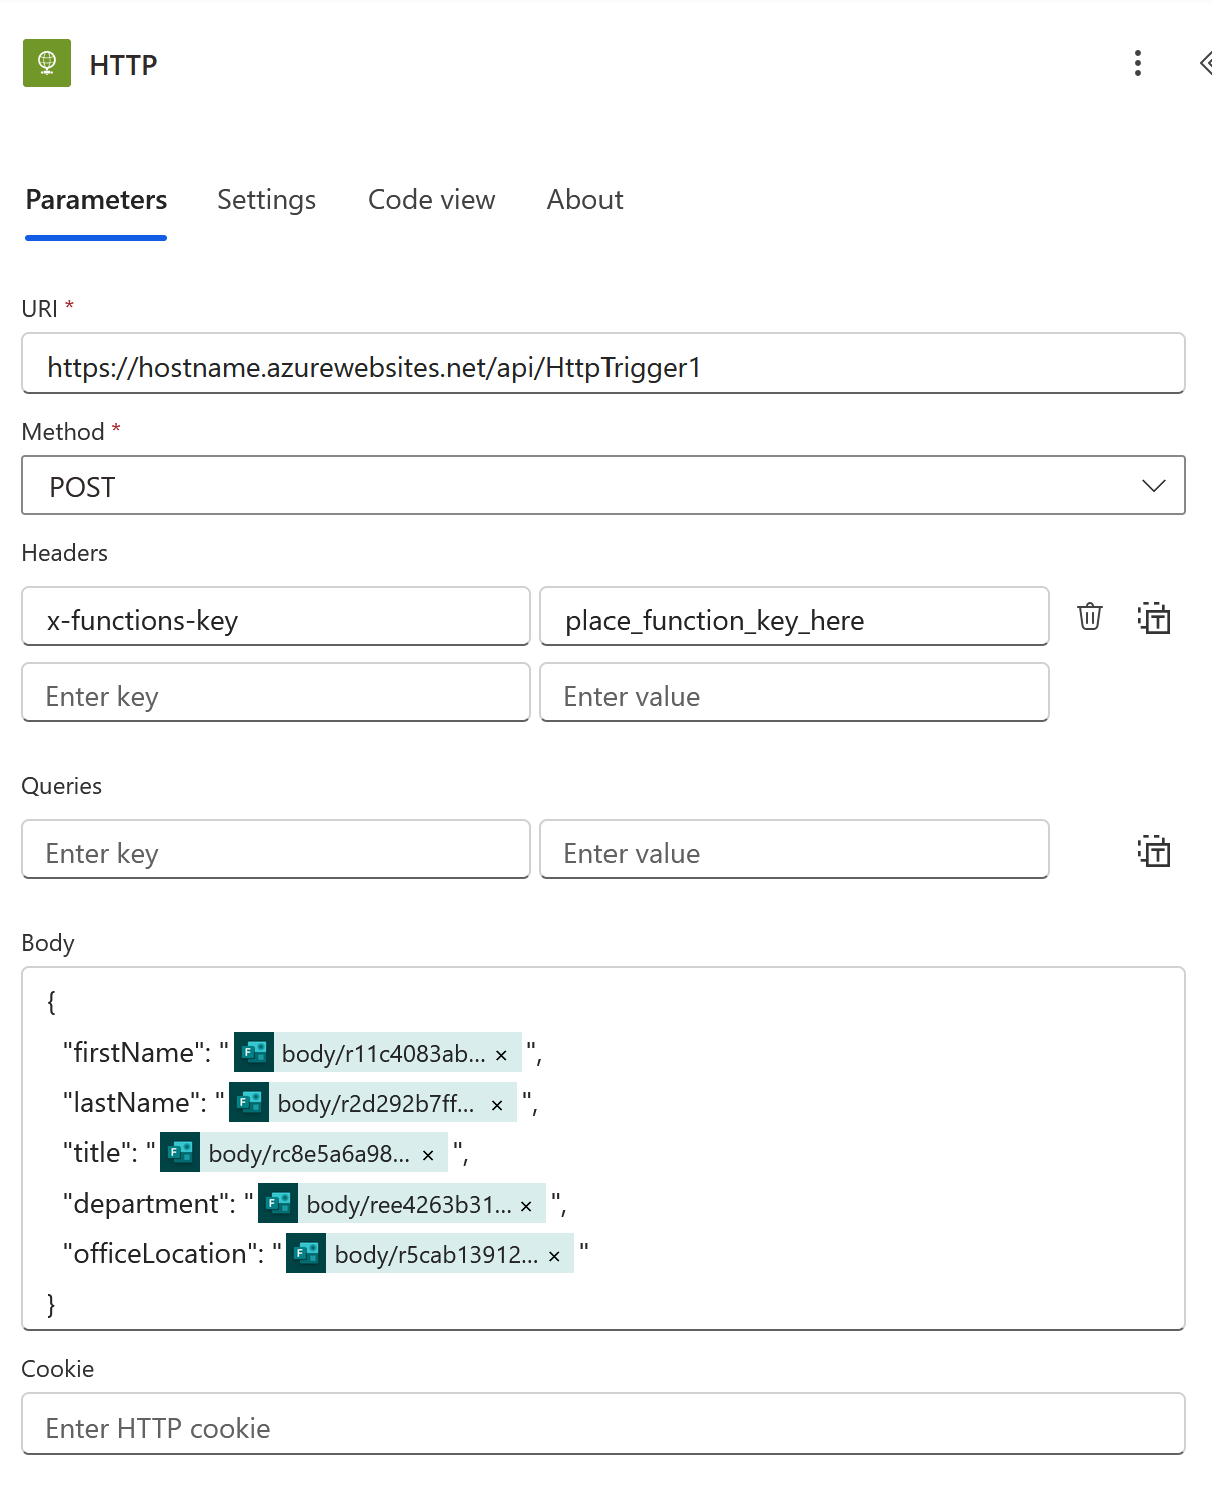
Enter your function's URI in the URI field (remember, it looks like "https://hostname/api/HttpTrigger1?code=function_key") and set Method to POST. However, we're going to place the function's key in a header, instead of the URL, so we can utilize the secure inputs feature of Power Automate to hide the key and keep it out of the logs. Enter x-functions-key for the header key and the code from your URI for the header value. Now strip off the query string from your URI, it should just say "https://hostname/api/HttpTrigger1" now.
Now paste this JSON into the Body field:
{
  "firstName": "",
  "lastName": "",
  "title": "",
  "department": "",
  "officeLocation": ""
}
For each key's value, add a dynamic content item and choose the corresponding value from the "Get response details" step of the flow. Be sure you place them inside the quotes. Your HTTP trigger should look like this:
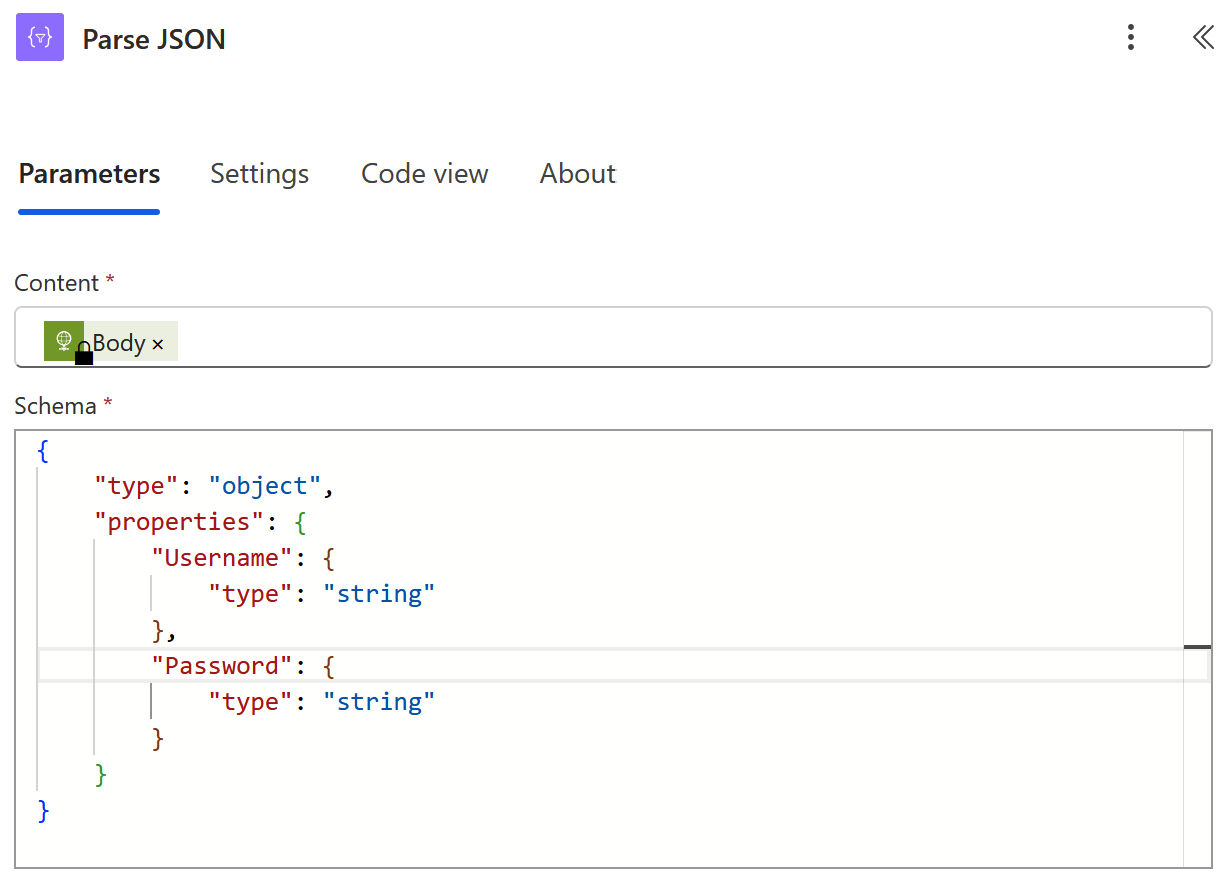
Next, add the "Parse JSON" action and in the Content field add the Body from the HTTP action. In the Schema field, add the below JSON:
{
    "type": "object",
    "properties": {
        "Username": {
            "type": "string"
        },
        "Password": {
            "type": "string"
        }
    }
}
Here's a screenshot:
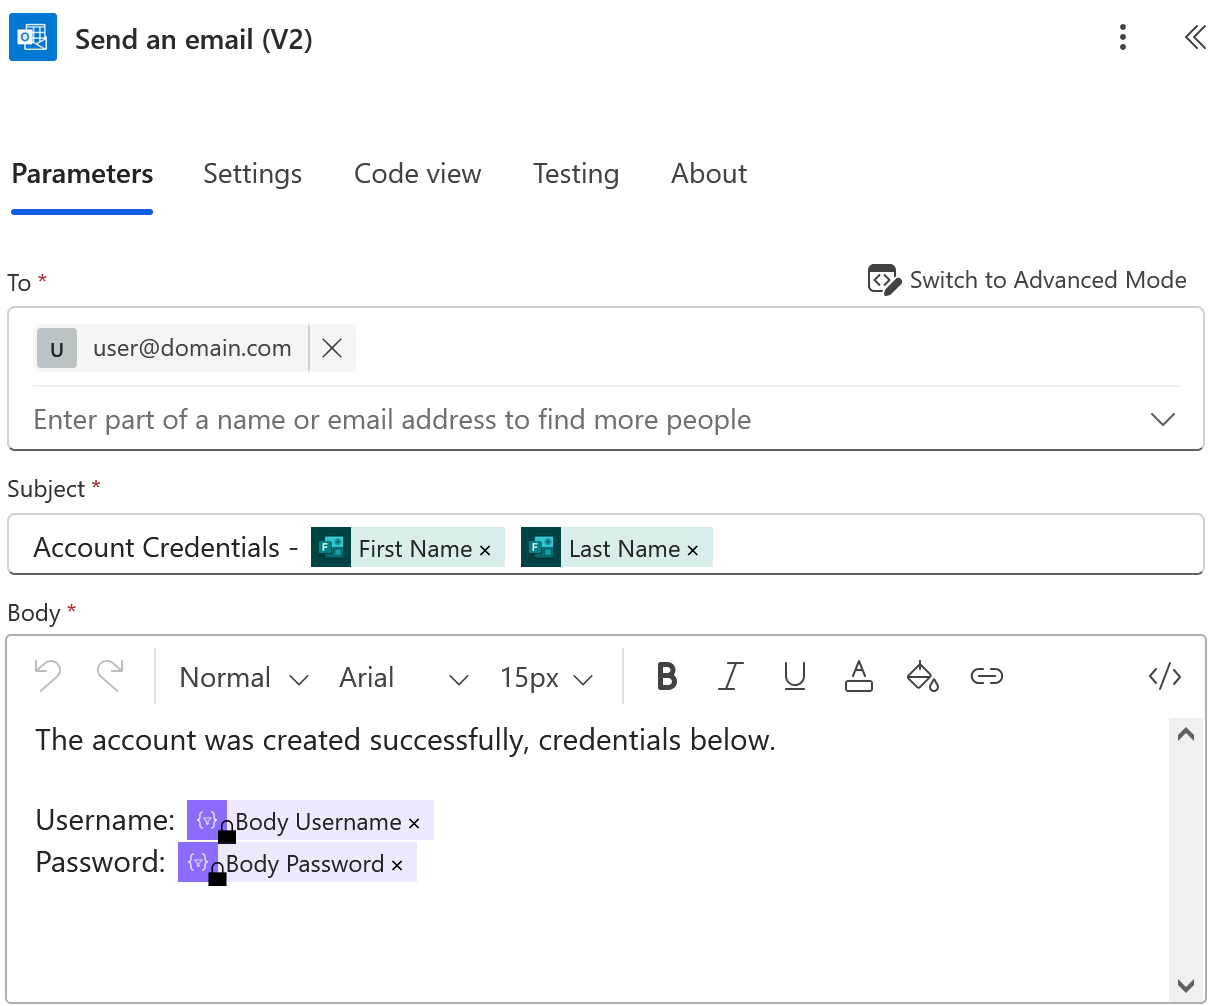
Now for the final step - add the "Send an email (V2)" action from the "Office 365" category. This requires the triggering user to have an Exchange license. Enter an addressee in the To field, pick a subject line, and then add the Username & Password from the last "Parse JSON" step.
OK, now we're ready to test. Save the flow and submit your form with some placeholder values. You'll receive an approval email:
Approve it and you'll receive another message with the account credentials:
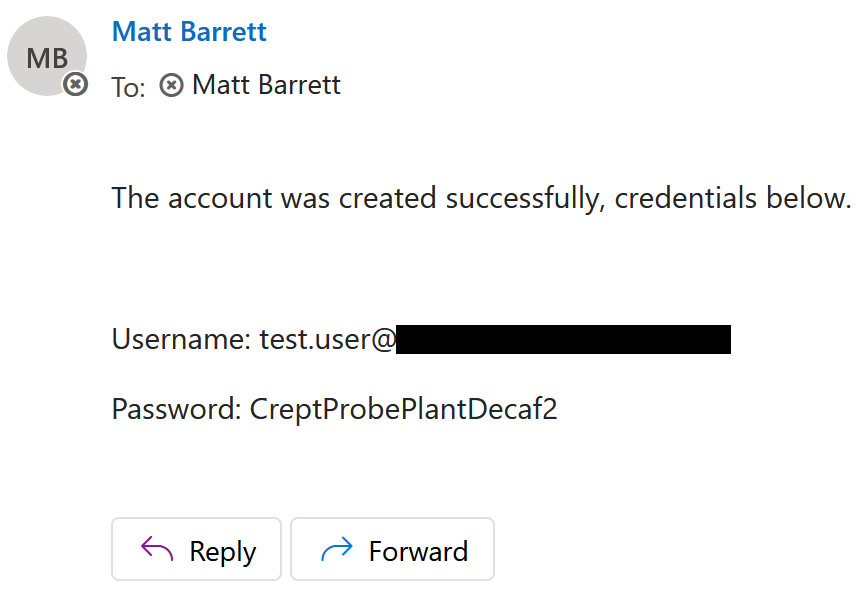
There you have it, one-click account creation.
Alright, I said the final step was above, but let's go back and add one more so we can handle failure states from the HTTP action. Add a parallel branch after the HTTP step and add another "Send an email (V2)" step from the "Office 365" category, same as the last one. Enter an addressee, a subject line, and in the email Body add the HTTP step's Body output.
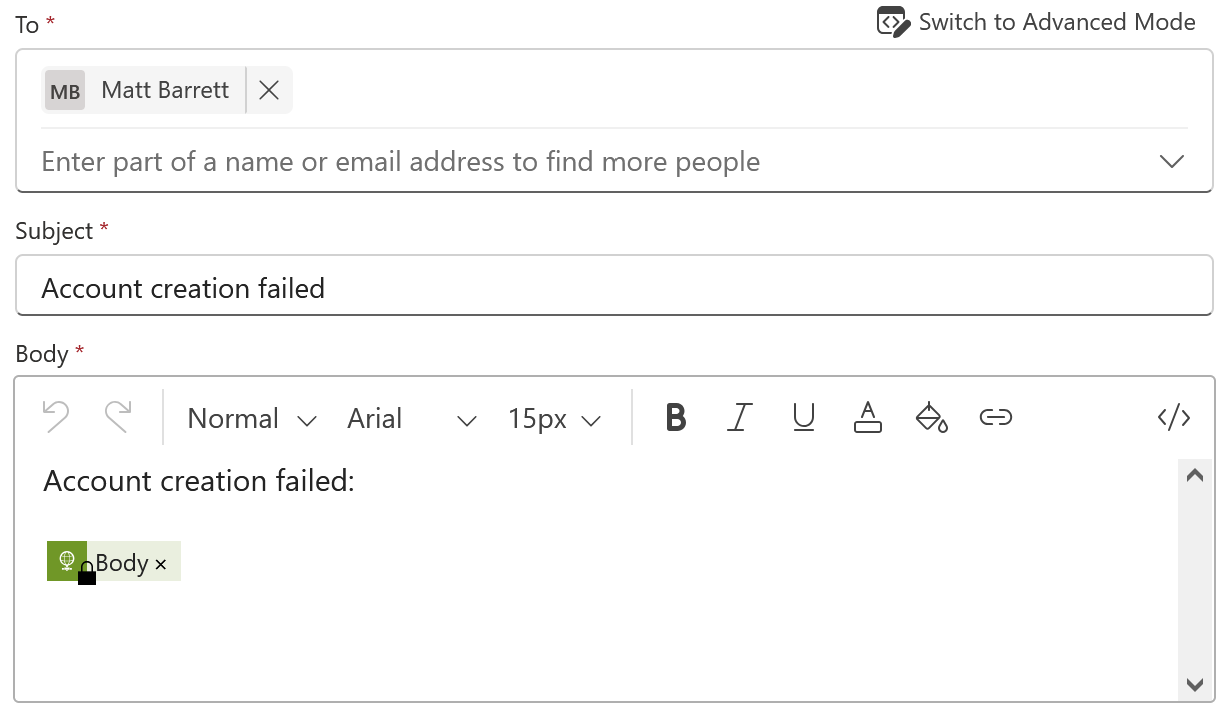
Now change to the Settings tab and set the step to only run if the HTTP step times out, is skipped, or fails.
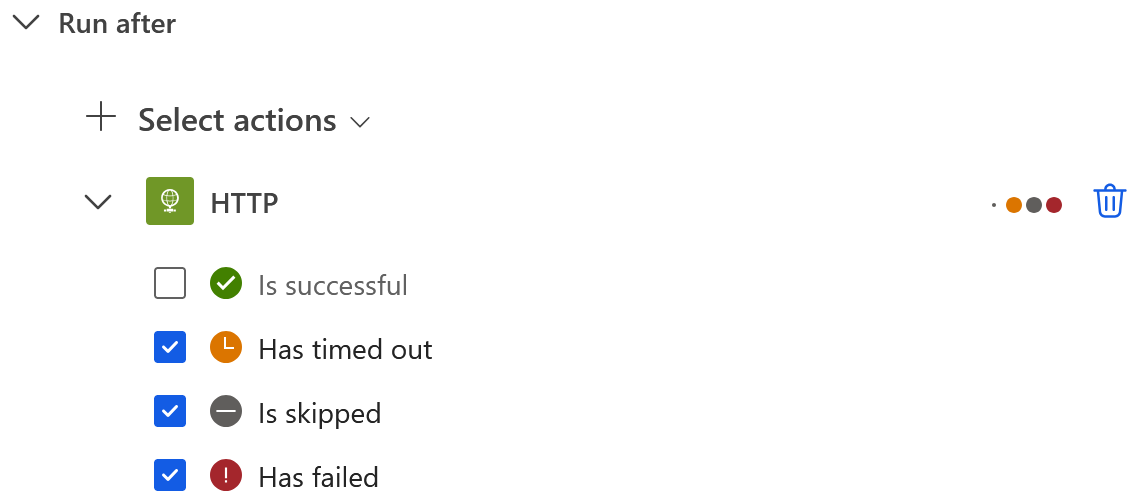
This way there's something to troubleshoot with in case the step fails.
Another onboarding step automated! This example provides the minimum steps to get up and running, but you can build on it. Create events on a shared onboarding calendar with the hire's name & start date, place the credentials in a ticket instead of emailing them, or hook in additional scripts to create accounts in other platforms.
Let's move on to accounts: Part 4 - Provisioning